Configuring and Testing the SR Pro Camera
Once the SR Pro Camera has been installed onto the VMX Robotics Controller, the next step is to ensure the camera is configured correctly and to verify the camera images can be accessed on the Raspberry Pi.
Configuring Raspberry Pi’s Camera Interface
By default, the VMX Robotics Controller Raspberry Pi SD Card enables the Raspberry Pi Camera interface. This can be verified from the Raspberry Pi “Preferences->Raspberry Pi Configuration” Menu Item:
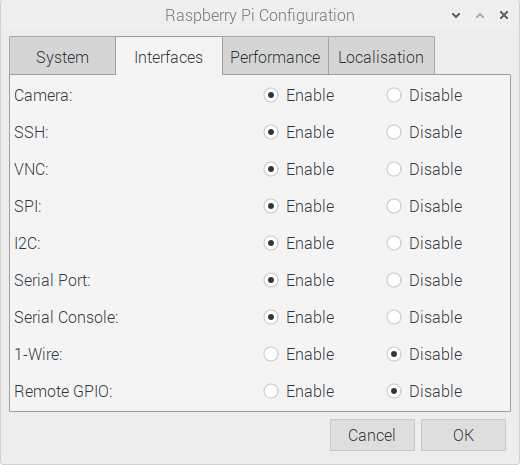
Raspberry Interface Configuration Dialog
The “Camera” interface should be enabled; if this setting is changed, the Raspberry Pi must be rebooted for the change to take effect.
Testing the Camera
To verify basic camera option, remove the SR Pro Lens cap, and acquire a still image by running the raspistill command from a Raspberry Pi terminal:
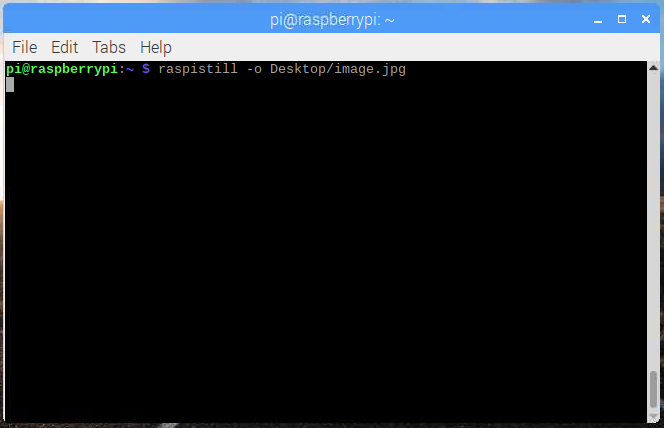
Acquiring an Image to File with raspistill
Once acquired, the image can be viewed from the Raspberry Pi Desktop.

Viewing the image captured with raspistill
NOTE: If your VMX Robotics Controller has an actively running Robot Program that is accessing the camera, raspistill will fail to acquire an image and output an error message.
If you are confident the SR Pro Camera is securely installed and still encounter an error message when Testing the Camera using raspistill, it’s possible a Robot Program running on the VMX Robotics Controller already has access to the SR Pro Camera; in this case, you can shut down any actively running Robot Program by issuing this command at a Raspberry Pi console:
frcKillRobot.sh
To restart the robot program, you can later run this command:
frcRunRobot.sh
Raspberry Pi Camera Video Device ID
When writing code to access the SR Pro Camera, the Video Input Device number must be used to address the Camera.
By default, when the SR Pro Camera is the only Video Input Device connected to the Raspberry Pi, it’s Video Input Device number is 0.
The Raspberry Pi raspistill utility can verify this, as it will display the Video Input Device number when the “-v” (verbose) option is provided as shown below:
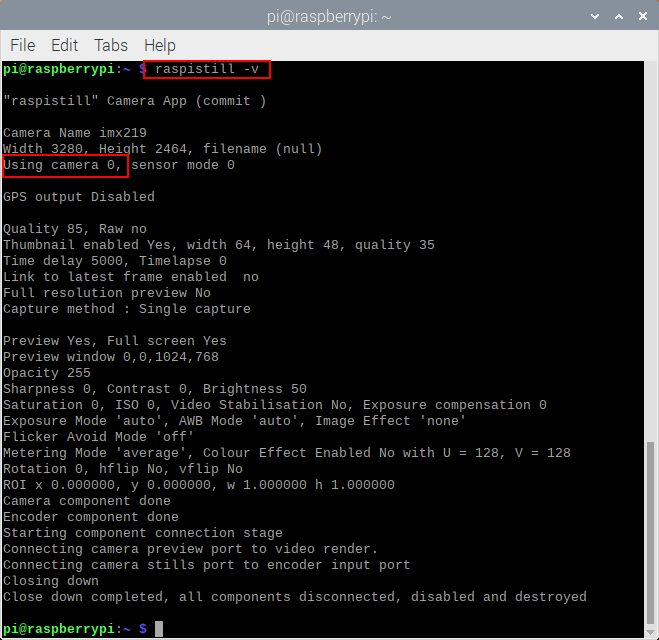
Displaying the Video Input Device number using raspistil’s verbose mode.
Simple Camera Test Script
The following python script, which runs directly on the Raspberry Pi, can be used to acquire video from the SR Pro Camera; this script uses the OpenCV Library to acquire images from the SR Pro Camera, convert them to grayscale, and render the images to the Raspberry Pi display. This script continues to run until the “ESCAPE” key is pressed.
Note that in the script code below, the “0” parameter to the cv2.VideoCapture() function indicates that Video Input Device 0 should be used.
Since both OpenCV and Python are pre-installed on the VMX Robotics Controller SD-Card, no other software must be installed to run the following script:
1 2 3 4 5 6 7 8 9 10 11 12 13 14 15 16 17 18 19 20 21 | import numpy as np import cv2 cap = cv2.VideoCapture(0) cap.set(3,640) # Width cap.set(4,480) # Height while(True): ret, raw = cap.read() raw = cv2.flip(raw, -1) gray = cv2.cvtColor(raw, cv2.COLOR_BGR2GRAY) cv2.imshow('raw', raw) cv2.imshow('gray', gray) k = cv2.waitKey(30) & 0xff if k == 27: # 'ESC' to exit break cap.release() cv2.destroyAllWindows() |
Simply save the above code to a file with a “.py” extension (for example “sr_pro_test.py”), and then execute it from a Raspbery Pi console by running this command:
python sr_pro_test.py
Accessing the SR Pro Camera using the WPI Library
The SR Pro Camera may be accessed from a Robot Program via the WPI Library CameraServer class, which works with the Raspberry Pi’s V4L2 driver to both configure and acquire camera data.
The Video Input Device number described above is used to specify the video camera in the WPI Library CameraServer class, as shown below:
// Creates UsbCamera and MjpegServer and connects them int sr_pro_video_input_device_number = 0; CameraServer.getInstance().startAutomaticCapture(sr_pro_video_input_device_number);
WPI Library-based vision processing techniques are documented in the WPI Libary vision processing documentation.